

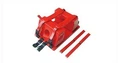


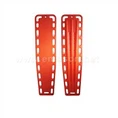


عمودی مانیتور مجرای خنک کننده CPR را وارد کنید EM {{0} & nbsp؛
شماره مورد: & nbsp؛ EM {1}} A & nbsp؛
& nbsp;
Package size:48.5x32.5x40cm & nbsp;
N.W:10.2KG
G.W:11.6KG & nbsp;
& nbsp;
ویژگی عملکرد
لوله گذاری حفره دهان
لوله گذاری بینی
& nbsp;
Notice : & nbsp;Please provide laryngoscope ,tooth support and resuscitator for yourselves , and the simulator doesn’t include these .
سوئیچ زنگ پایه را به عقب برگردانید و اکنون آماده تمرین لوله گذاری است.
& nbsp;
لوله گذاری حفره دهان
1.Preparation
الف) لارنگوسکوپ را بررسی کنید ، وقتی لنزها به درستی دسته را پیوند دهند ، چراغ روشن خواهد بود.
ب) سوراخ های مجرا را بررسی کنید ، از سرنگ برای تزریق هوا به کاف استفاده کنید تا از نشت هوا جلوگیری کنید ، و سپس هوا را از روی سوراخ کنید.
ج - سطح جلوی داکتوس و کاف را با پارچه نرم آغشته به روغن روان کنید.
D. intratrachea را با روان کننده آغشته به روغن بشویید.
& nbsp;
2. Put the model on its back , head backwards and put up neck ,make mouth ,paarynx and trachea be on one axes.
& nbsp;
3. Trainee should stand at the side of model head , left hand hold laryngoscope , laryngoscope and larynx show a right angle, laryngoscope lens embed tongue root, go up laryngoscope a little, place lens at the joint of epiglottis and tongue root after seeing the edge of epiglottis, go up laryngoscope and then the glottis can be seen .
& nbsp;
4. بعد از ظهور گلوتیس ، مجرای دست راست را نگه دارید ، آن را به آرامی درون گلوت قرار دهید. هنگام قرار دادن حدود 1 سانتی متر ، آن را با حرکت "جهت عقربه های ساعت و ضد counter {2}} در جهت عقربه های ساعت در اطراف ساعت بچرخانید ، بزرگسالان را در حدود 4 سانتی متر ، کودکان حدود 2 سانتی متر کار کنید.
& nbsp;
5.Plug a tooth support at the side of ductus, and then take out laryngoscope.
& nbsp;
6. Connect resuscitator with ductus , press resuscitator to inflate ductus .
& nbsp;
7. If ductus insert into trachea, to inflate will make lungs inflation; if insert into esophagus ,to inflate will make stomach inflation with beep.
& nbsp;
8.Fix the ductus and tooth support after ductus inserted into trachea .
& nbsp;
۹- از سرنگ برای تزریق هوا به کاف استفاده کنید تا مجاری و مجاری دیافراگم دیواری شود ، که می تواند در هنگام استنشاق از نشت هوا {{1 جلوگیری کند و پوک و ترشح از عقب به نای منتقل شود.
& nbsp;
10.Please use syringe pump air off cuff before plug out ductus .
& nbsp;
11. If using laryngoscope incorrectly and pressing tooth , it will warn with beep.
& nbsp;
لوله گذاری بینی
مجرای عمودی را داخل سوراخ بینی قرار دهید ، مجرای حلقوی را به حفره حلق در امتداد گوشتوس بینی فشار دهید. لارنگوسکوپ دستگیره سمت چپ ، بعد از عبور مجرای بینی از لوزه ، گلوتیس را لخت کنید ، دست راست همچنان مجرا را وارد گلوتیس می کند.
& nbsp;
نگهداری
1. Clean lubricant of ductus and cuff with soft cloth after training .
& nbsp;
2. Clean with mild soap and water ,do not submerse torso in cleaning fluids or water.
& nbsp;
3. Use only on clean surface. Avoid felt tipped markers, ink pens & nbsp;,acetone, iodine of other staining products and avoid placing the torso on newspaper or linked lines of any kind.
& nbsp;
4.If warning beep can’t work ,check the batteries, and check again after replacing the batteries .
& nbsp;
5. To ensure longevity, torso should be cleaned after each training session and a general inspection should be conducted regularly.
& nbsp;
6. Store properly between teaching sessions .
تگ های محبوب: عمودی مانکن آموزش ductus cpr را وارد کنید ، چین ، تامین کنندگان ، عمده فروشی ، عمده به صورت عمده ، موجودی ، خرید تخفیف ، ساخته شده در چین, Opleiding manikin, Opleiding manikin vir baba, Opleiding manikin half liggaam, Superior LCD CPR -opleiding Manikin, Ander Manikins, CPR Manikins


